The Problem With Presenter View
Presenter View was built for a room with a projector. Your laptop shows the notes and the projector shows the slides, and nobody minds you glancing down at a lectern.
On a video call it works against you. The notes sit in the middle of your screen, about 10° below the camera, which is well past the point where viewers stop reading your gaze as eye contact. On a single laptop it's worse, because the slides and the notes compete for the same screen, and sharing the wrong one shows everybody your notes.
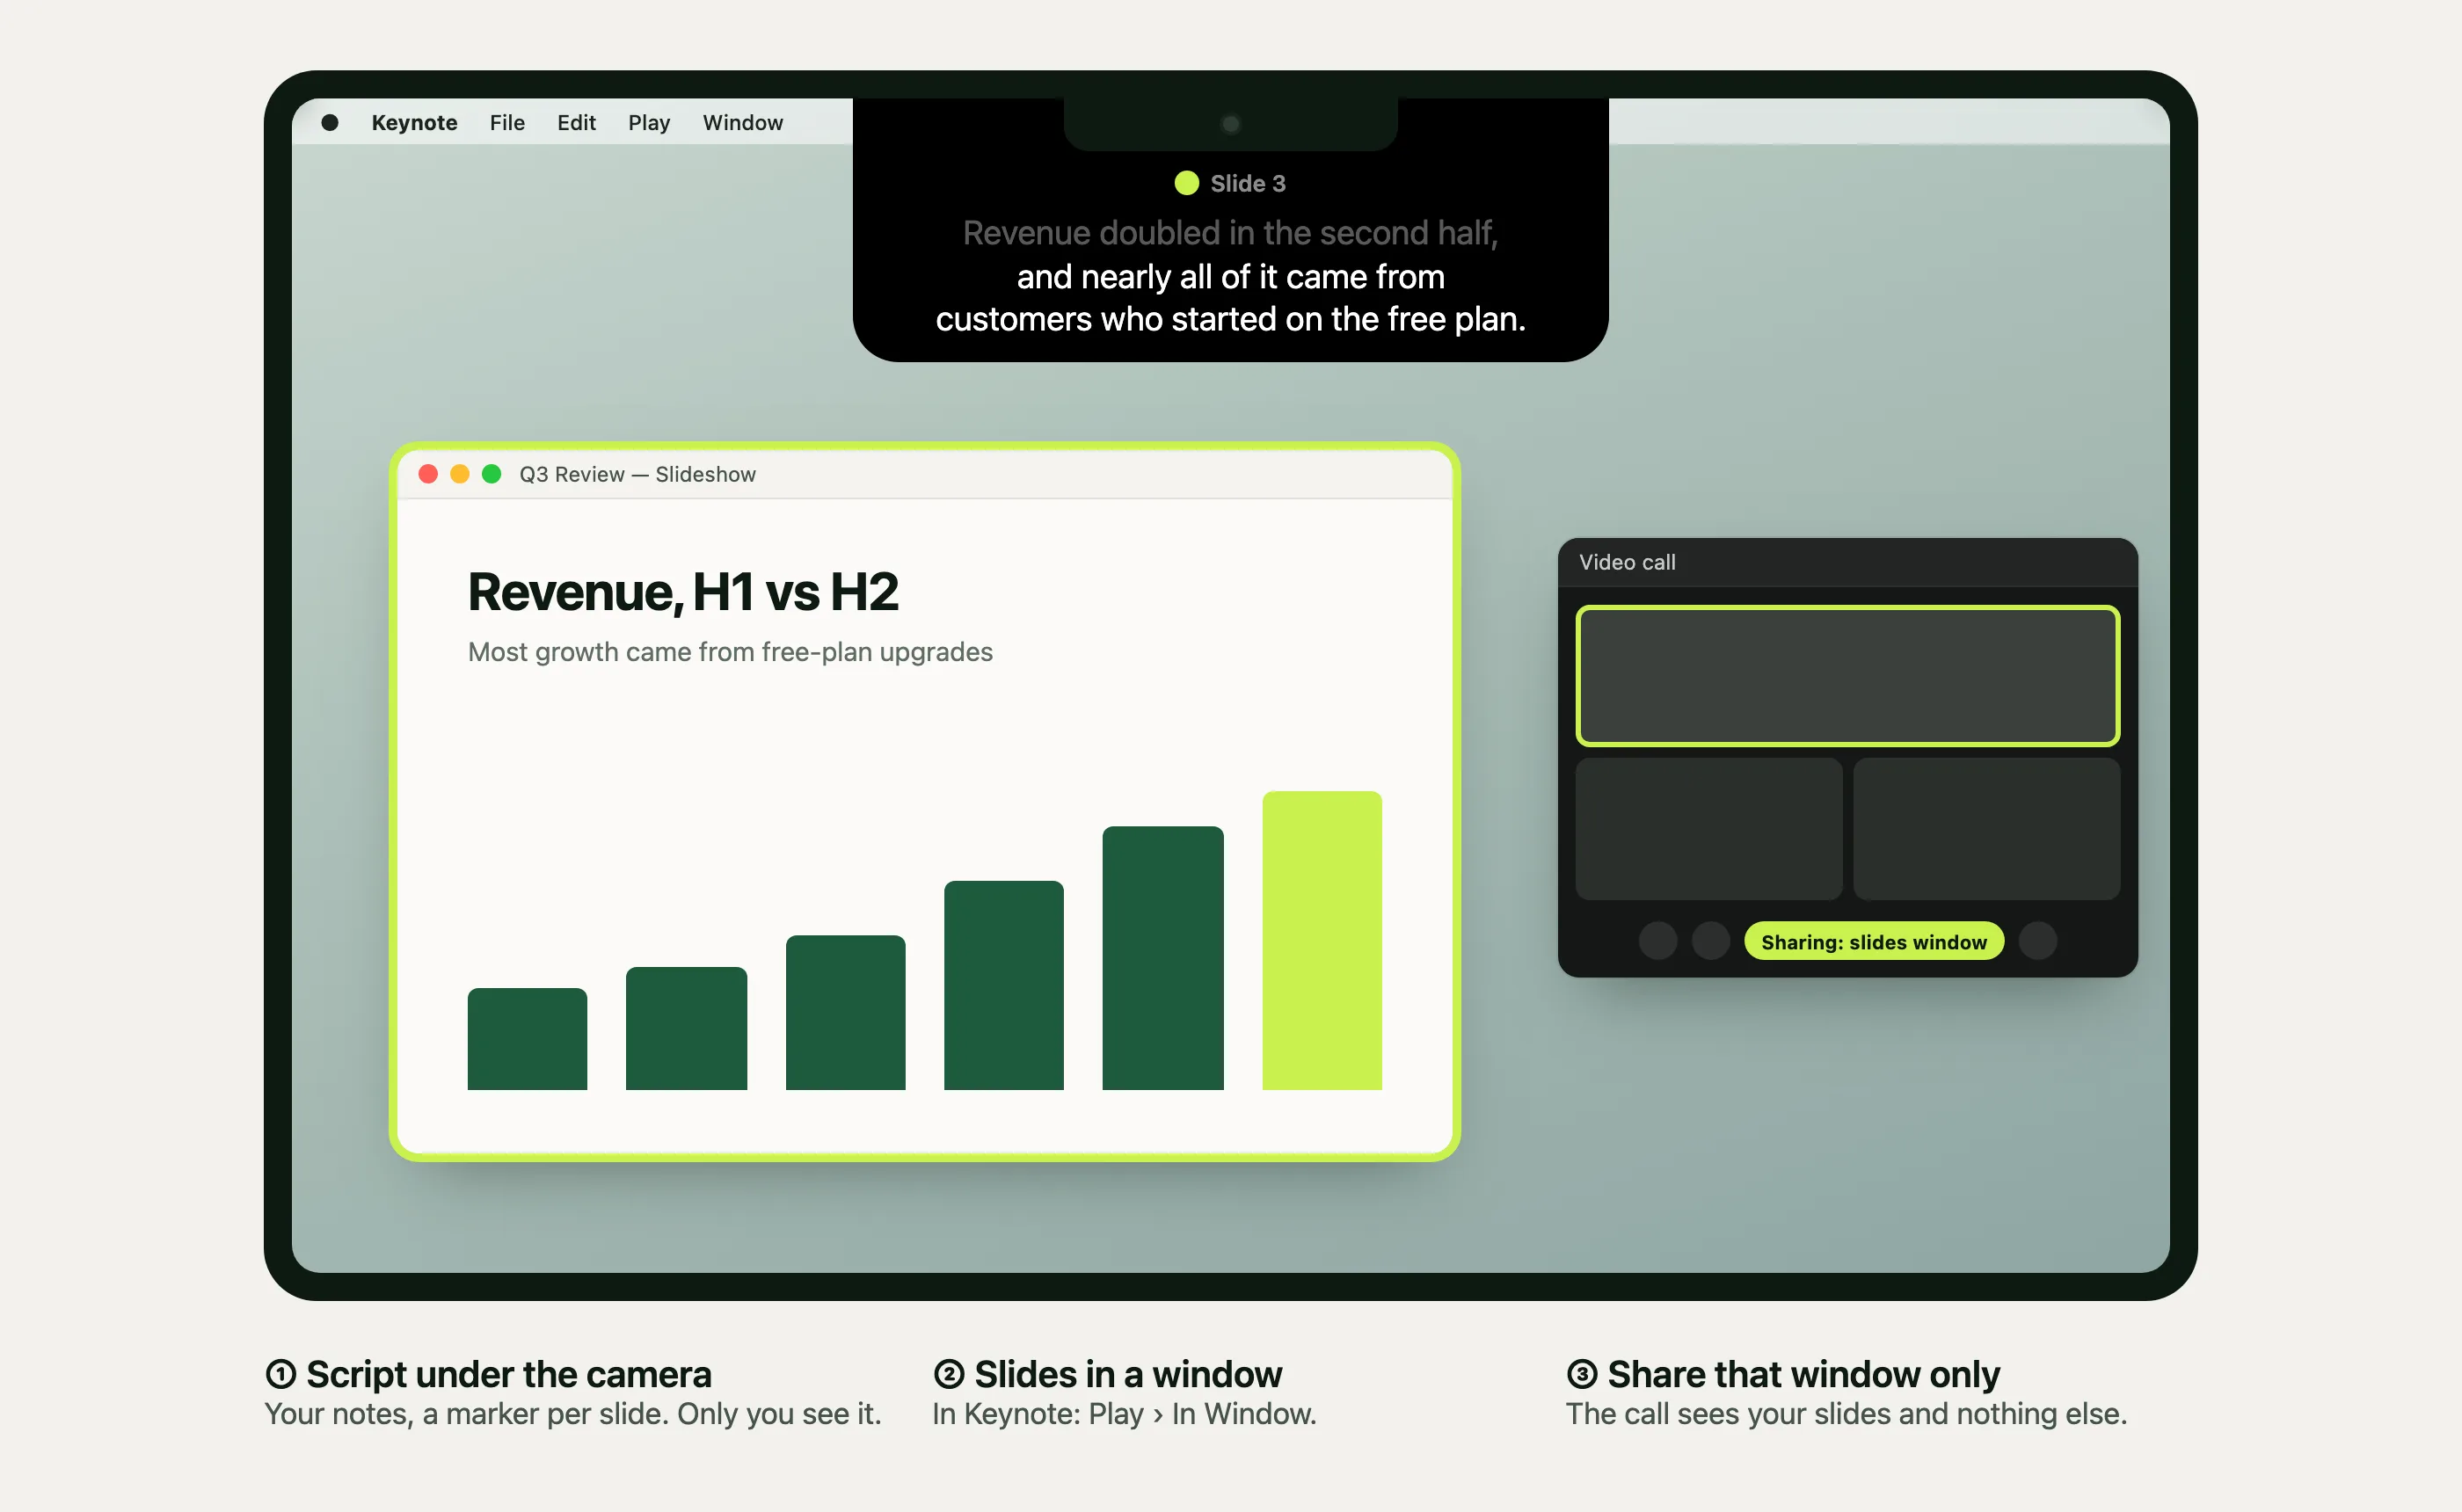
The fix has three parts: put the notes right under the camera, play the slides in a window, and share only that window.
Step 1: Turn Your Notes Into a Script
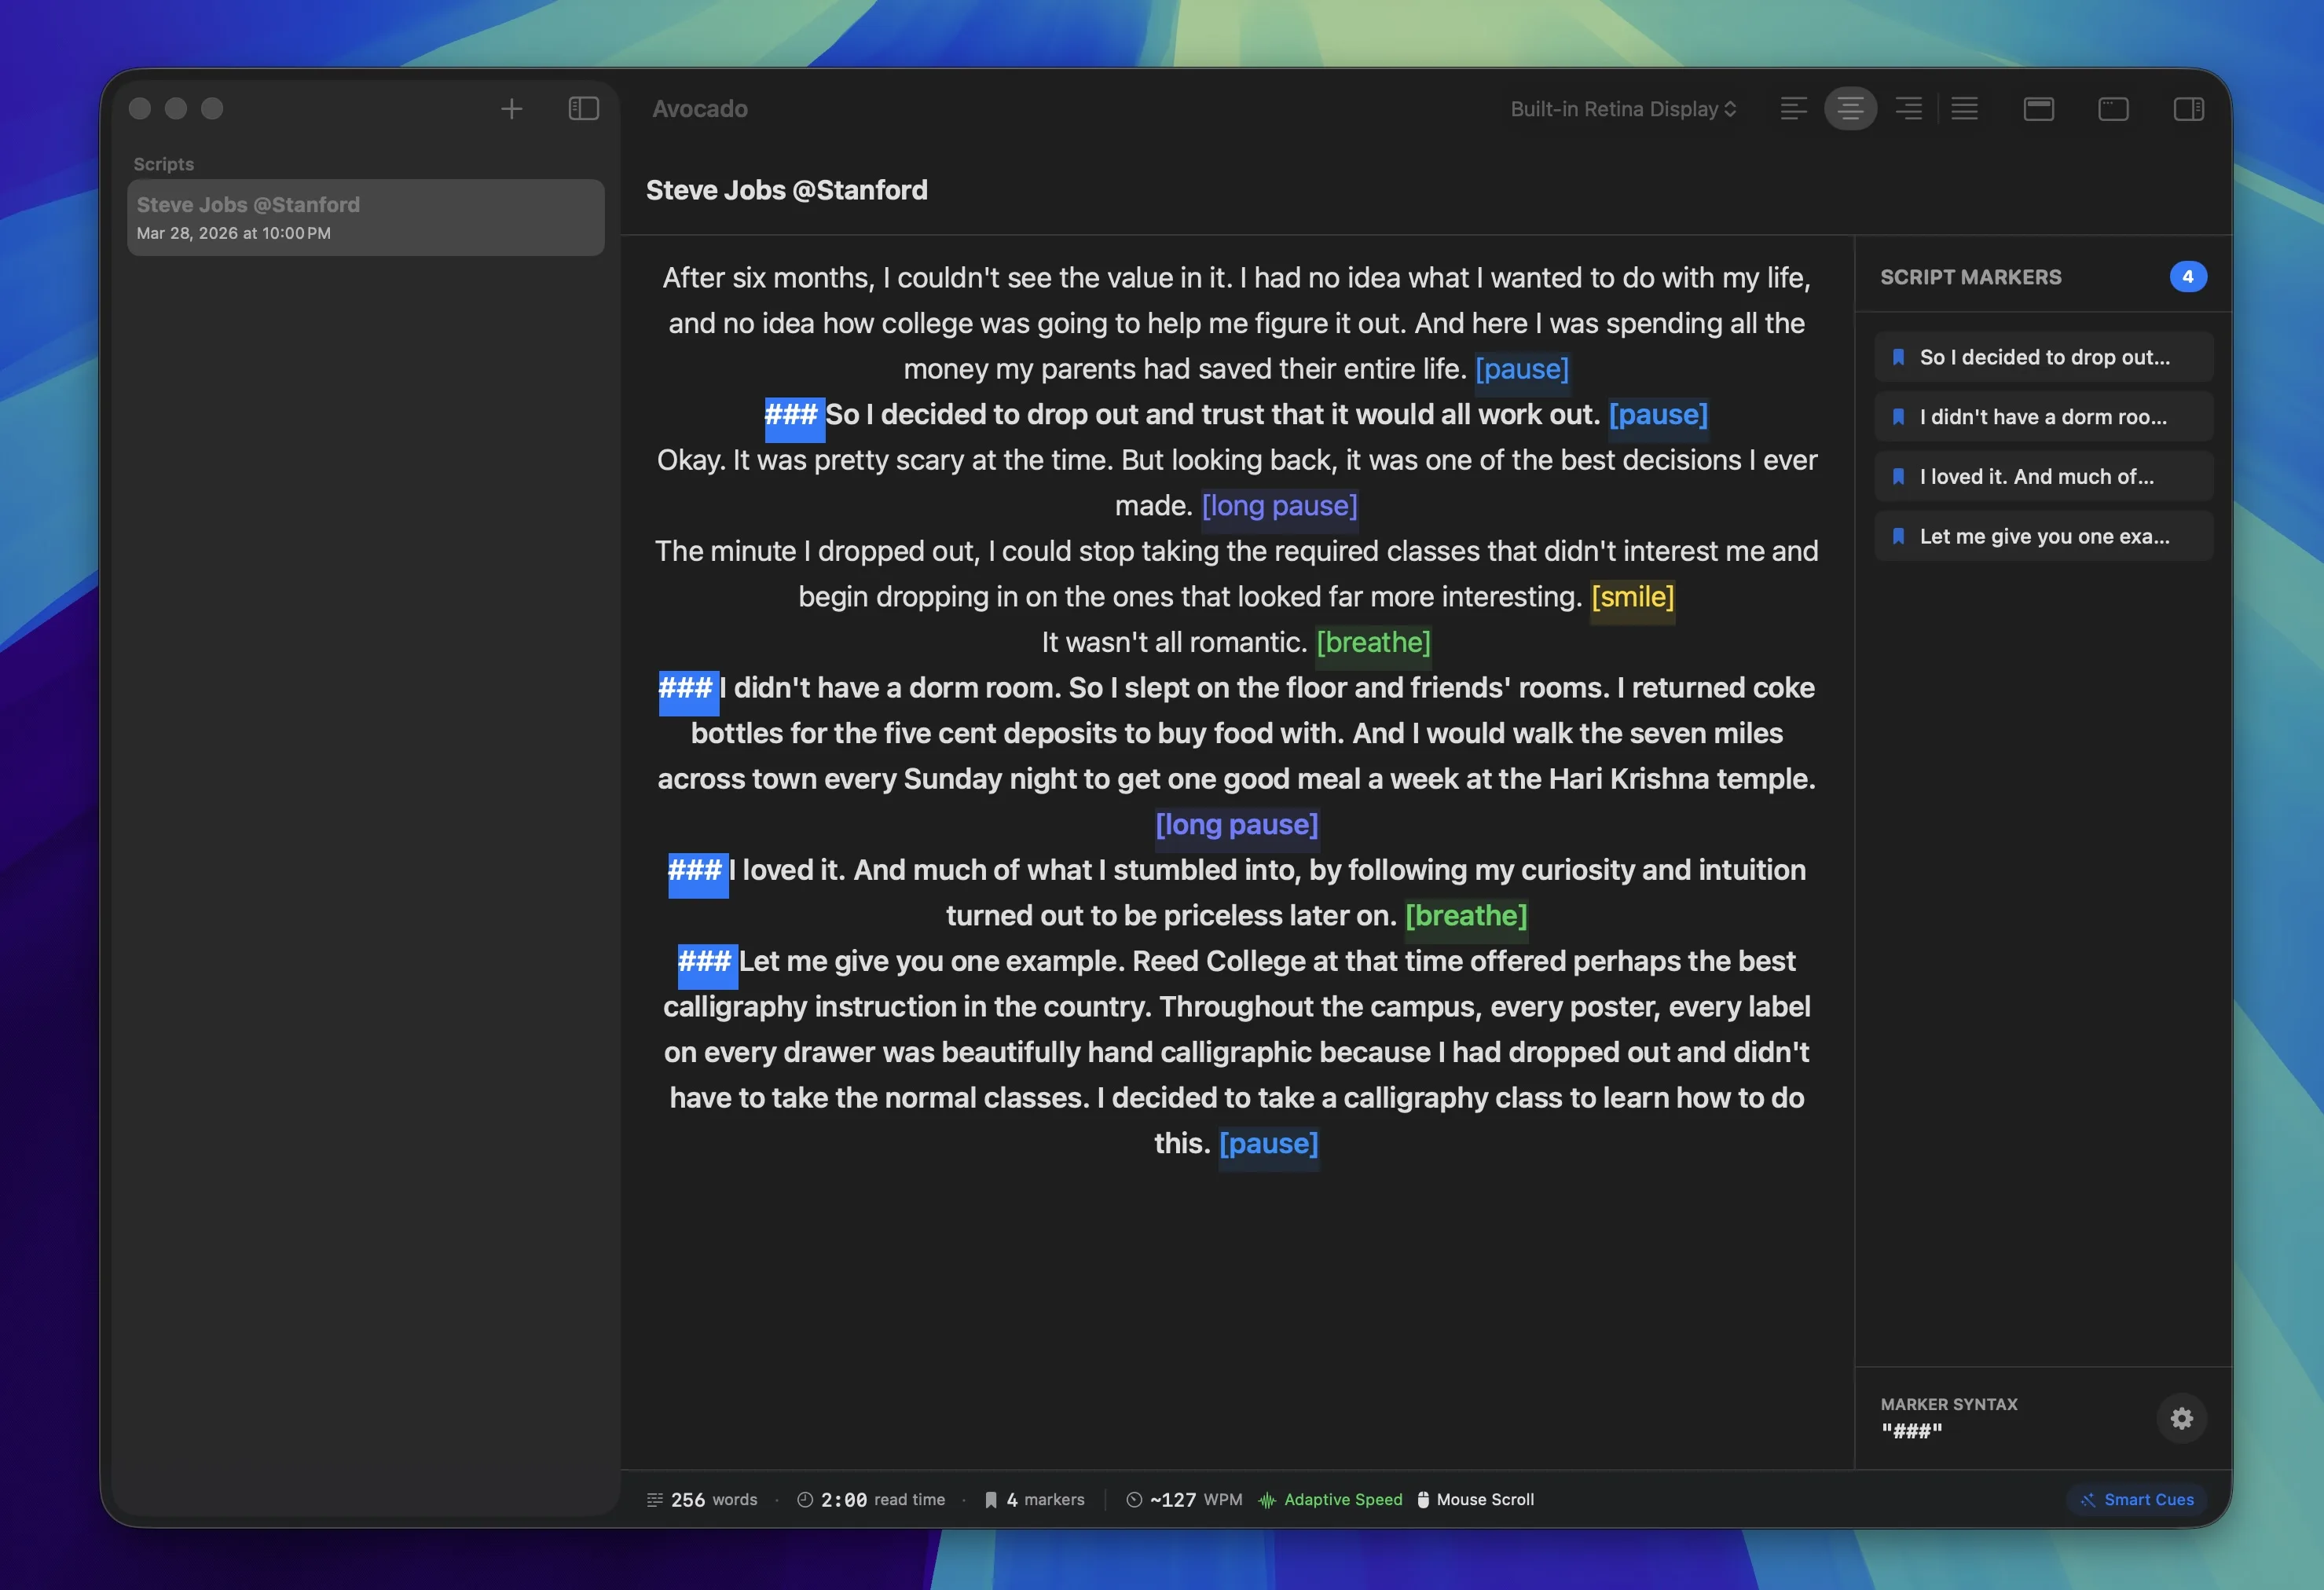
In Avocado, drag your .pptx file into the editor. It reads the speaker notes rather than the slide text, and each slide's notes become their own section, headed by a marker that reads "Slide 3", "Slide 4" and so on. Slides without notes are skipped. Text and Markdown files work the same way, if you keep your talk in a .txt or .md file instead.
Using Keynote? Choose File › Export To › PowerPoint first. Your presenter notes come across as speaker notes, and the exported file imports like any other.
Before you present, read the notes out loud once. Notes written as reminders ("Q3 numbers, mention churn") are hard to say smoothly. A sentence or two per slide, written the way you'd say it, reads much better.
Step 2: Put the Script Under the Camera
On a MacBook, open the prompter in the notch, right next to the camera. That keeps the line you're reading within a few degrees of the lens, inside the zone where viewers still see eye contact. (Here's how big to make the text and how wide to make the lines.)
With an external webcam, use the floating prompter instead and drag it to sit just under the camera.
Avocado's prompter doesn't appear in screen shares, screenshots or recordings, so you can share your whole screen and the audience still won't see it.
Step 3: Play the Slides in a Window and Share Only That
On one screen, the slides need to play in a normal window so they don't cover everything else.
- Keynote: choose Play › In Window. The slideshow plays in its own window, and you can still use other apps.
- PowerPoint: open Slide Show › Set Up Slide Show, choose Browsed by an individual (window), then start the slideshow. It plays in a window you can resize. (Presenter View itself can't be shrunk into a window on a Mac, which is another reason to read from a prompter instead.)
In Zoom, Teams or Meet, share that window rather than your entire screen. The audience sees your slides and nothing else, and moving between apps won't flash anything on their screen.
Presenting: Keep the Script and the Slides in Step
You still change slides yourself, the way you normally would. The markers tell you when: as "Slide 4" comes up in the prompter, move to the next slide.
The script can follow you. With voice scrolling, Avocado tracks your place in the script as you talk and holds when you stop, so you can pause for a question without the notes running off. If you'd rather not use your voice, set a steady speed, and nudge it with ⌘↑ and ⌘↓ mid-talk.
Two Pro features help here too. Click-Through lets your clicks pass through the prompter to the slides behind it, and with two displays, Follow Mouse moves the prompter to whichever screen your pointer is on.
With Two Screens
A second display makes it simpler. Put the slides on the external screen and share that screen, and keep the prompter on the MacBook, under its camera. If your camera sits on top of the external display, move the floating prompter there instead, just below the lens.
Speaking in a room with a projector? The same setup works. The projector shows the slides, and your laptop on the lectern shows the script, a marker per slide, with no need to squint at the small notes in Presenter View.
What PowerPoint and Keynote Offer on Their Own
Both apps have a built-in option, and each is worth knowing.
- PowerPoint's Record feature has a Teleprompter view that shows your notes for the current slide above the slide preview, with auto-scroll. It's built for recording a narrated deck inside PowerPoint, so it doesn't help in a live call.
- Keynote's presenter display can sit in its own window next to the slideshow when you choose Play › In Window. The notes are there, but they're wherever you put that window, usually well below the camera.
For a recorded narration with no audience, PowerPoint's teleprompter view is a reasonable choice. For anything live, or when you want your eyes on the lens, a prompter under the camera works better.
A Quick Checklist
- Write your notes as full sentences you'd actually say.
- Drag the
.pptxinto Avocado (export from Keynote first). - Open the prompter in the notch, or under your external camera.
- Play the slides in a window, then share only that window.
- Change slides as each "Slide" marker comes up.
The import, markers, notch prompter and screen-share invisibility are all in Avocado's free tier. Voice scrolling is Pro, and the free tier includes three voice sessions a week, enough to try it on a real presentation.